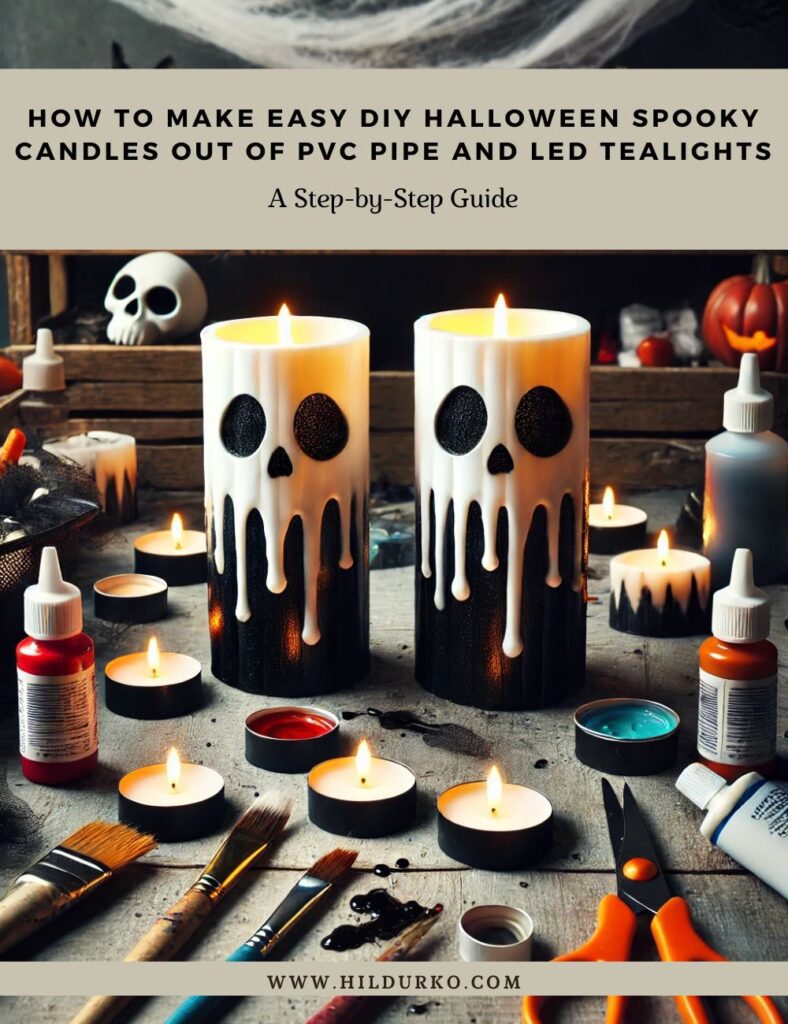
Out of PVC Pipe and LED Tealights
Creating a spooky ambiance for Halloween doesn’t have to be expensive or complicated. One of the simplest yet most effective decorations you can make are spooky candles using PVC pipes and LED tealights. These DIY Halloween candles look like dripping wax but are completely safe and reusable year after year. They can be customized in various sizes, colors, and styles to fit your Halloween theme perfectly. Here’s a step-by-step guide to help you make your own eerie glowing candles using inexpensive materials.
Materials You’ll Need:
- PVC pipes (various lengths and diameters)
- LED tealights: These are safe, battery-powered candles.
- Hot glue gun and glue sticks: For creating the dripping wax effect.
- Acrylic paint: Black, white, red, or any spooky color of your choice.
- Sandpaper: To smooth the cut edges of the PVC.
- PVC pipe cutter or saw: For cutting the PVC pipes.
- Masking tape or painter’s tape: To hold tealights in place if needed.
- Optional embellishments: Plastic spiders, fake moss, or cobwebs for extra spooky decor.
Step-by-Step Instructions:
Step 1: Cut the PVC Pipes
Start by cutting your PVC pipes into various lengths. This will create a more dynamic and layered look when the candles are displayed together. Aim for a mix of short, medium, and tall candles. You can cut the pipes using a PVC pipe cutter or a small hand saw. The most common candle heights range between 4 to 12 inches, but you can go taller for a more dramatic effect.
After cutting the pipes, use sandpaper to smooth out any rough edges. This will prevent any accidental injuries and make the edges look cleaner.
Step 2: Create the Dripping Wax Effect
Now it’s time to create the spooky wax drips on the PVC pipe. Heat up your hot glue gun and begin applying hot glue to the top edge of each pipe. Let the glue naturally drip down the sides to mimic the look of melted candle wax. You can vary the length and thickness of the drips for a more realistic effect.
For thicker “wax” drips, you can go over some areas with multiple layers of hot glue. Allow the glue to cool and harden completely before moving to the next step.
Step 3: Paint the Candles
Once the hot glue has dried and set, it’s time to paint your PVC candles. Acrylic paint works best for this project because it adheres well to both PVC and the hot glue. Choose a spooky color palette—black, white, or blood-red are great options for Halloween. You can also opt for eerie greens or purples to match your theme.
Use a medium-sized paintbrush to cover the entire surface of the PVC pipe and the hot glue drips. Make sure to paint in thin, even layers to avoid streaks. Depending on the paint you’re using, you may need to apply two or three coats for full coverage. Allow each layer to dry completely before applying the next.
Step 4: Add Details and Highlights
For an extra spooky touch, you can add details like blood splatters, cracks, or cobweb effects using a fine-tipped brush or sponge. If you’re going for a Gothic look, consider adding metallic highlights like gold or silver to the edges of the candle drips. A light dry-brushing technique can help bring out the texture of the drips and make the candles look more aged and weathered.
If you’re making bloody candles, use red acrylic paint to create a dripping blood effect over the hot glue wax drips. You can lightly brush the red paint downward to mimic flowing blood.
Step 5: Insert the LED Tealights
Once the paint has dried, it’s time to add your LED tealights. These flameless tealights are battery-operated and perfect for placing inside the PVC pipes. Simply drop the tealight into the top of each pipe. Most PVC pipes will be wide enough to accommodate a standard-sized tealight.
If the tealight doesn’t fit snugly, you can use masking tape or painter’s tape to secure it. Place a small amount of tape around the base of the tealight and gently press it into the pipe until it stays in place.
Step 6: Display Your Spooky Candles
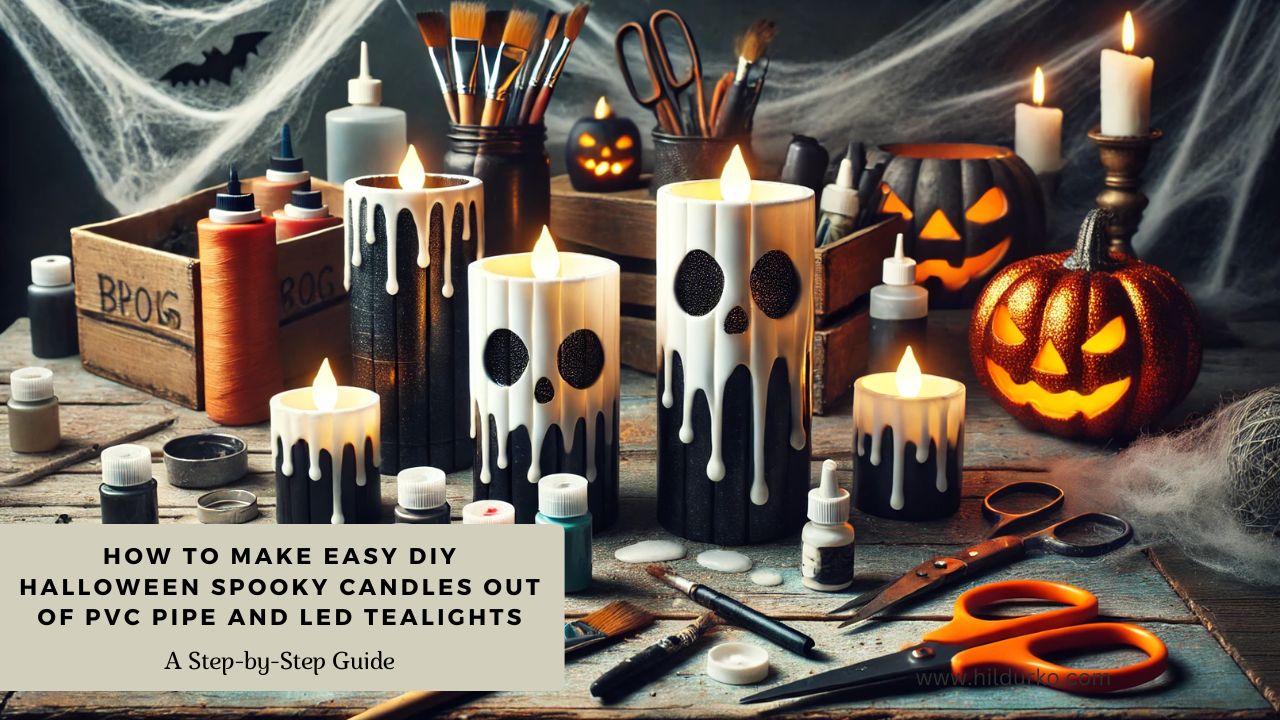
Your DIY Halloween spooky candles are now complete and ready to be displayed! Arrange them together for a creepy centerpiece, scatter them around your home, or line them along your walkway to create an eerie atmosphere for trick-or-treaters. You can also embellish the candles with extra Halloween decorations like plastic spiders, fake cobwebs, or moss for added effect.
Tips for Making the Best DIY Spooky Candles:
- Experiment with sizes and shapes: For a more interesting display, use PVC pipes in various diameters and heights. Larger pipes make great statement pieces, while smaller pipes add dimension to your display.
- Customize your colors: Don’t feel limited to classic black or white. You can paint your candles in any color to match your Halloween theme, from ghastly greens to haunted purples.
- Create a haunted candleholder: Place your candles in a spooky candleholder or arrange them around skulls, pumpkins, or other Halloween props for a dramatic display.
- Use glow-in-the-dark paint: If you want an extra creepy effect, use glow-in-the-dark paint for your candles. This will make them glow eerily even when the lights are off.
Alternative Halloween Candle Ideas:
- Floating candles: Create a floating candle effect by hanging the PVC pipe candles from invisible thread or fishing line. They’ll look like they’re hovering in the air, perfect for a haunted house vibe.
- Giant candles: Use large-diameter PVC pipes to create oversized spooky candles that can serve as outdoor decorations or porch accents.
- Bloody candles: For a scarier look, create blood-dripping candles by painting your hot glue drips with red paint to look like blood oozing from the candles.
Conclusion
Making DIY Halloween spooky candles out of PVC pipes and LED tealights is a fun and simple project that brings a lot of impact to your Halloween decor. With just a few materials, you can create eerie, realistic-looking candles that will add a touch of the macabre to any space. Whether you make a few for a centerpiece or a whole set to decorate your yard, these candles will help set the perfect spooky tone for your Halloween festivities.
Check out these helpful videos!
If you enjoy the videos mentioned in this post, we encourage you to visit the creators’ channels and give them a like. Your support helps them continue to produce high-quality content and share their creative ideas with the community. By liking and subscribing to their channels, you not only show your appreciation but also stay updated with their latest projects and tips.
Happy crafting
LIKE THIS POST?
Share the link on your social media