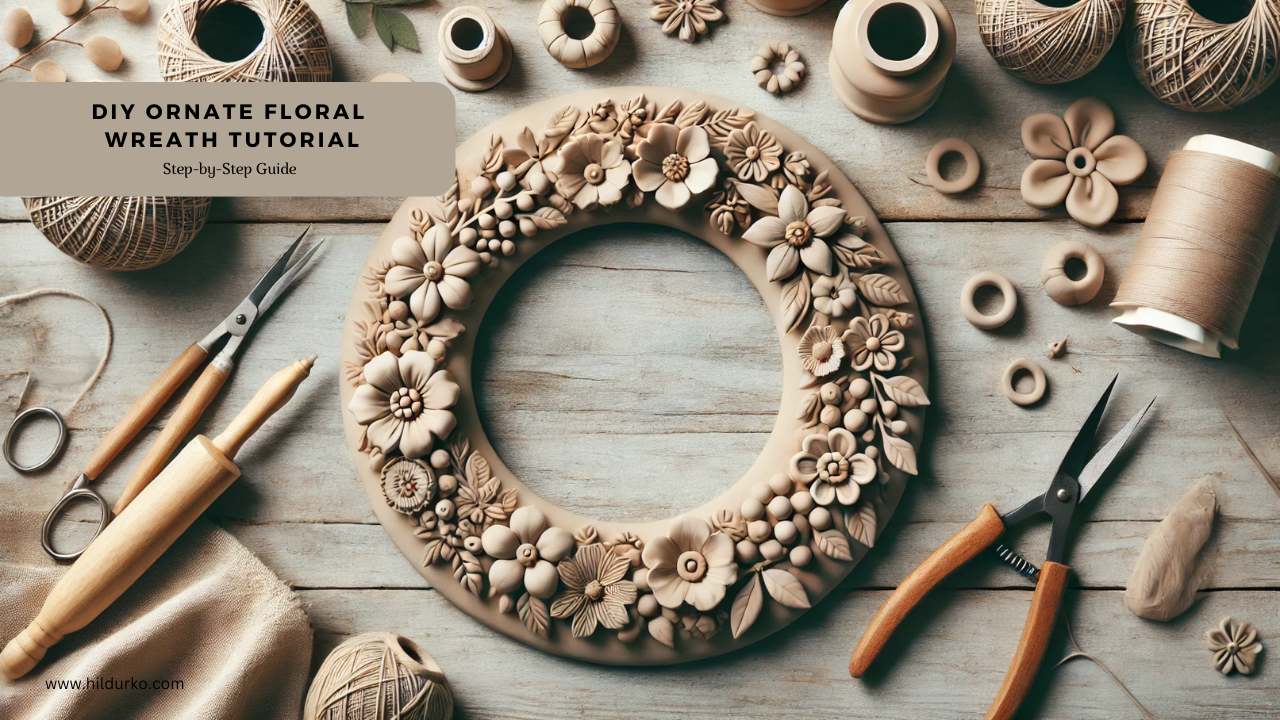
Materials Needed:
- Foam or wire wreath form (size depends on your preference)
- Air-dry clay or polymer clay for creating the intricate floral and ornamental designs
- Silicone molds to create the detailed leaves, flowers, and other ornamental elements (optional for ease)
- Textured paint or plaster for creating the aged, stone-like effect
- Acrylic paints for highlighting details (use metallic or muted tones like silver, gold, or antique white)
- Sculpting tools for shaping clay
- Hot glue gun for attaching the clay ornaments to the wreath form
- Sealant for preserving the paint and clay
Step-by-Step Instructions:
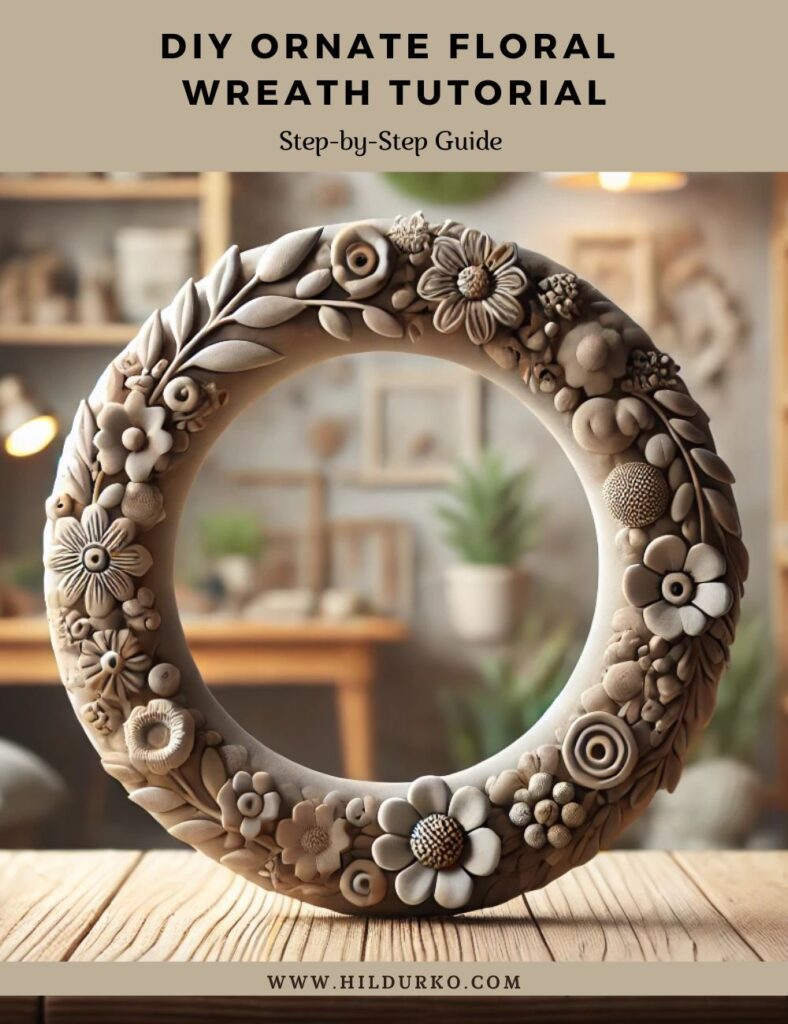
- Prepare the Wreath Form: Start with a foam wreath or any sturdy base. If you want added texture, cover it with plaster or textured paint to create a worn, stone-like finish similar to the wreaths in the photos.
- Create the Clay Elements: Use air-dry or polymer clay to craft intricate floral designs and ornamental pieces. You can either sculpt them by hand or use silicone molds for ease and consistency. Be sure to create a variety of sizes and shapes for a dynamic, layered look.
- Attach the Clay Pieces: Once the clay pieces have dried, carefully arrange them around the wreath form. Use a hot glue gun to secure them in place. You may choose to layer pieces, starting with larger elements like roses or scrollwork and filling in gaps with smaller flowers and leaves.
- Paint the Wreath: After all the clay pieces are secured, apply a base coat of paint to the entire wreath. Neutral tones like antique white, beige, or pale pink work well for a vintage look. Once dry, use metallic paints (e.g., silver or gold) to dry-brush over the raised details for an aged effect.
- Finishing Touches: For an extra ornate look, consider adding faux pearls, ribbons, or lace as embellishments. Finally, spray the wreath with a sealant to protect the clay and paint from damage.
Tips for Customization:
- Aged Effect: To replicate the antique, shabby-chic appearance in the photos, lightly sand some areas of the painted wreath to expose the underlying layer or apply a wash of diluted gray paint to create an aged patina.
- Versatility: While the wreath in the images appears neutral, feel free to experiment with pastel colors or brighter hues depending on the season or occasion.
Check out these videos for more ideas!
If you enjoy the videos mentioned in this post, we encourage you to visit the creators’ channels and give them a like. Your support helps them continue to produce high-quality content and share their creative ideas with the community. By liking and subscribing to their channels, you not only show your appreciation but also stay updated with their latest projects and tips.
Happy crocheting!
LIKE THIS POST?
Share the link on your social media