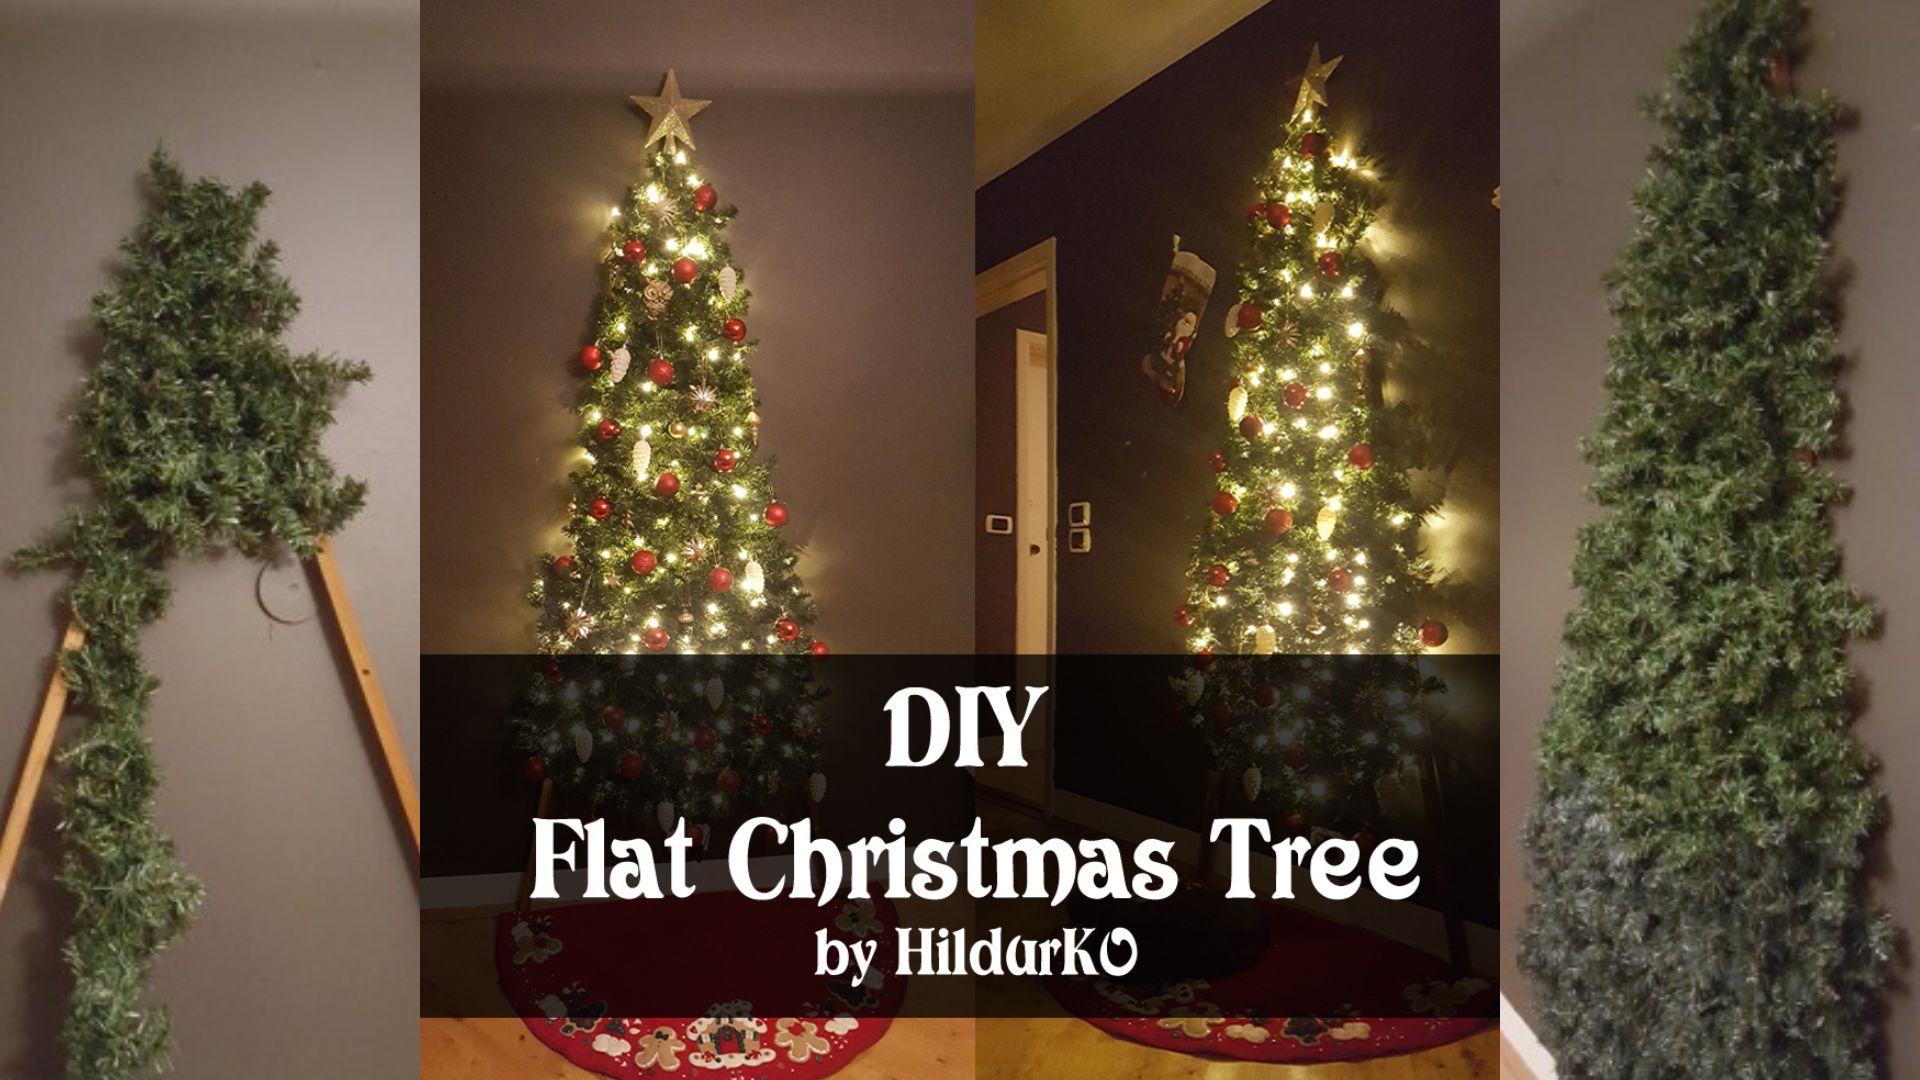
Welcome to our creative corner where we embrace the joy of DIY and the festive spirit of Christmas! Today, we’re delving into the enchanting world of DIY Christmas trees, specifically focusing on a unique, space-saving, and pet-friendly design: the Flat Christmas Tree. This innovative concept is not just a solution for small spaces or cat owners but also a fresh take on traditional holiday decor.
Minimalist Christmas tree
In recent years, the trend of minimalist Christmas trees has gained significant momentum. People are increasingly looking for eco-friendly, easy-to-store, and unconventional Christmas tree alternatives. That’s where our DIY Flat Christmas Tree comes into play. It’s a fantastic project for craft enthusiasts and those looking to add a personal touch to their holiday celebrations.
Our step-by-step guide will walk you through creating your very own flat Christmas tree using simple materials like wood, garlands, and wire. This project is not only budget-friendly but also incredibly versatile. Whether you live in a cozy apartment or want to add an additional tree to your home without taking up too much space, this tree is perfect. Plus, it’s an excellent option for homes with curious pets – nomore worrying about your cat toppling over the traditional tree!
We’ll cover everything from selecting the right materials to putting together your tree and adding the final decorative touches. Additionally, we’ll provide tips on how to customize your tree to match your home decor and personal style. Imagine a rustic Christmas tree with burlap garlands or a contemporary one with metallic ornaments – the possibilities are endless.
Join us as we explore this festive DIY project. Whether you’re a seasoned DIYer or a beginner, you’ll find our guide easy to follow and fun. Let’s create a Christmas tree that’s not only a beautiful centerpiece for your holiday celebrations but also a testament to your creativity and resourcefulness.
Cat-Friendly Diy Flat Christmas Tree Tutorial
Are you a festive cat owner who’s tired of finding your beloved furball climbing the Christmas tree or batting off ornaments? Fear no more! I’ve created the perfect solution—a stylish, cat-proof flat Christmas tree! This ingenious design is not only a safeguard against curious paws but also a chic and space-saving addition to your holiday decor.
🐾 Why a Flat Christmas Tree? 🐾
I love the holiday season, but my cats seemed to love it a bit too much—specifically, they loved using the traditional tree as their personal jungle gym. Not only was it a safety concern for my adventurous felines, but my holiday spirit was wilting like the needles on the floor. That’s when I decided to design a tree that’s beautiful, functional, and most importantly, cat-friendly!
Materials Needed:
1. Two pieces of wood (approximately 1-2 inches wide and 4-6 feet tall)
2. Drill and bits for making holes
3. Four green garlands (length depending on tree size)
4. Strong wire or fishing line
5. Wall hooks or a base to stand the tree
6. Optional: Christmas lights, ornaments, and a tree topper
Instructions:
Preparing the Wooden Structure:
1. Lay the two pieces of wood parallel to each other on the ground, with a distance equal to the desired width of your tree base.
2. Using a drill, make holes at equal intervals from top to bottom on each piece of wood. Ensure the holes on both pieces line up horizontally when the wood is placed parallel.
3. At the top, drill a single hole through both pieces of wood where they meet at the apex of the tree shape. This will be used to secure the pieces together at the top.

Assembling the Tree:
1. Stand the two pieces of wood in an inverted ‘V’ shape to resemble a tree outline. Secure the top by threading wire through the top holes and twisting to hold the pieces together.
2. Starting from the top, thread the wire through the corresponding holes on each piece of wood, creating a horizontal line across the ‘V’ shape.
3. Attach the end of a garland to the wire at one side, then gently wrap the garland around the wire, moving across to the other side.
4. Secure the garland at the other end, then move down to the next wire level and repeat the process. Ensure that the garlands are draped to your liking, with enough slack to create a full look.
5. Continue this process for all horizontal wire lines.

Finishing Touches:
1. Once all garlands are in place, you can add Christmas lights by weaving them in and out of the garlands.
2. Attach ornaments as desired by hanging them on the garland or securing them with additional wire.
3. If desired, add a tree topper at the apex of the tree.
4. Secure the tree to the wall using wall hooks, or create a stand to keep it upright.
Safety Tips:
– Ensure the tree is securely fastened to avoid any accidents.
– If using lights, make sure they are safely attached and the wires are not a tripping hazard.
– Keep the tree away from open flames or heat sources.
And there you have it! Your very own flat Christmas tree that’s perfect for small spaces or a unique twist on traditional holiday decor. Enjoy your festive creation!


